Want to use one of your stunning photos in your website design, but don’t want that rugged background? From product photography to agile website design, sometimes an image is even better with no background. But even trying to tackle the task without the right tools, even the most skilled photographer wants to throw the computer into the window. Maybe you are designing something for a client and you need to remove your background to make the finished product look right. Whatever the reason, you’re asking yourself: “How can I make a background transparent in my picture?”
Fortunately, recent updates to Adobe Photoshop make the process easy – and sometimes as simple as a few clicks. A new feature in Photoshop 2020 makes the background transparent with a few clicks, though complex images may require manual background removal.
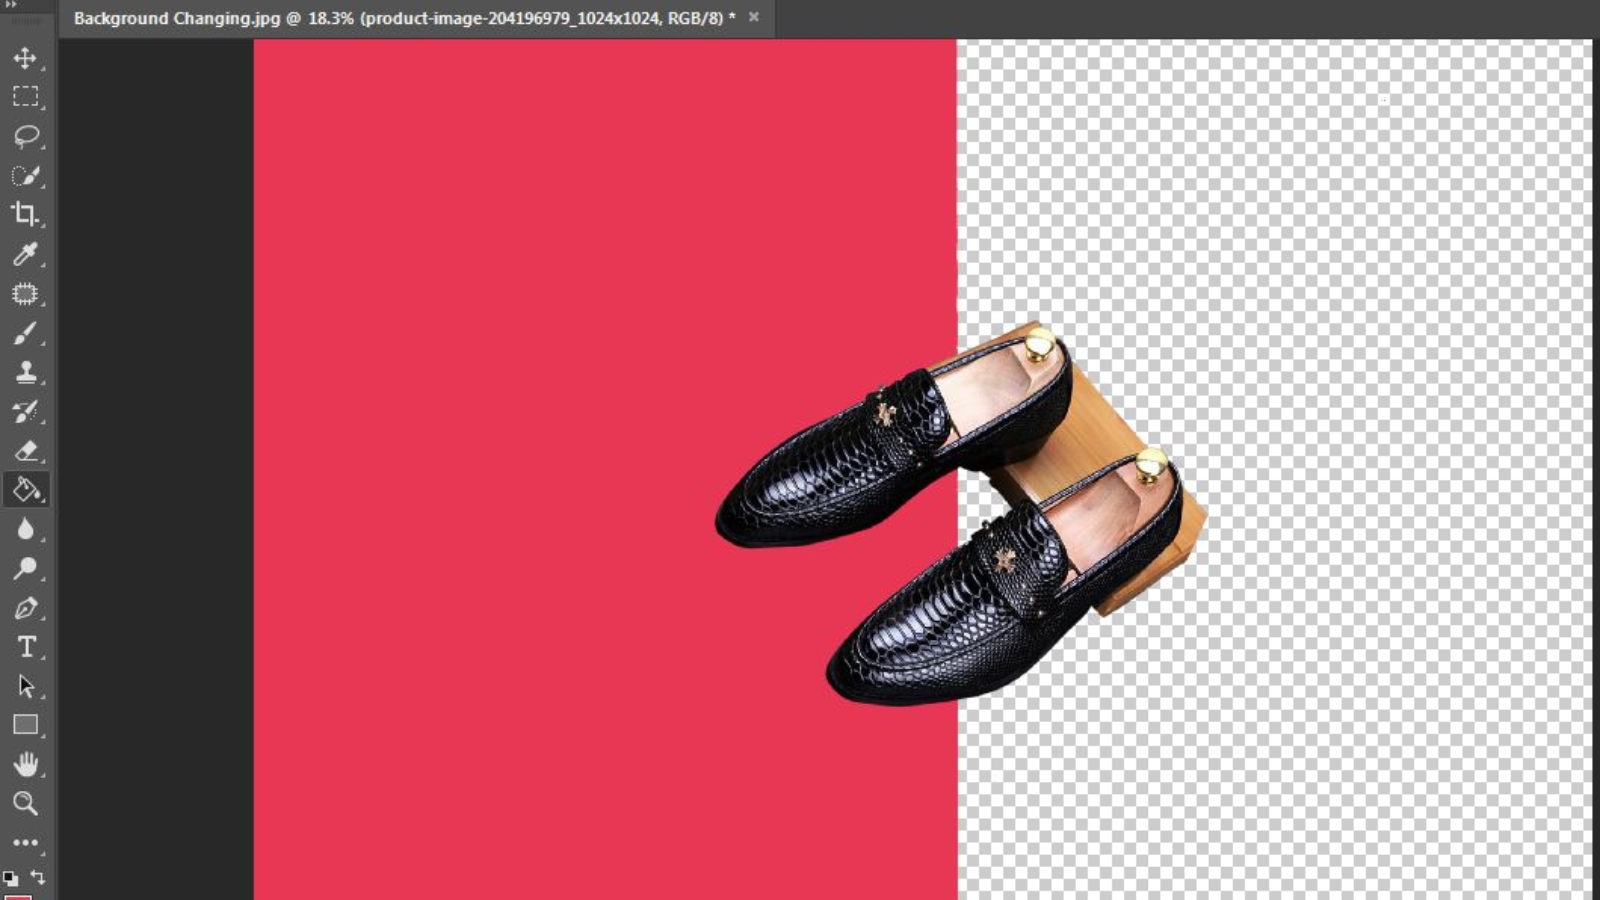
Fast way to remove any background in Photoshop (background removal)
Photoshop 2020 comes with a new background removal shortcut powered by the Select Subject tool. The shortcut may not always get it right every time, but it can be very easily refined for general images and others. Before you begin, make sure you have Photoshop 2020, version 21.0.0 or later – if not, you need to update the software first.
Start by copying the background layer to create the kind of layer that the Photoshop tool needs to use. Select the entire photo (Command + A in MacOS or Control + in Windows) and copy and paste. In the Layers panel, click the icon next to the background layer to hide the background. From here, you’ll be working with the new levels you just created.
In the Properties panel on the right, navigate to the Quick Actions section. If you cannot see the Properties panel, click the icon that appears:
With the Photoshop Adobe feature icon
Under Quick Actions, click Remove Background. You may have to wait a few minutes for the program to find the subject and remove the background. When the program is finished, you should see the subject in a transparent background (designated by a checkered pattern). If you do not see that transparent background, make sure your background layer is hidden.
In Photoshop 2
This quick method works great for some photos with ridiculous results for others. If this doesn’t work for you, proceed to the manual method below. If the result is close, but not quite perfect, click on the mask that Photoshop automatically created (black-and-white image in the layer
panel). With the mask selected, use a white paint brush to add to the subject and a black paint brush to erase any areas that have not been removed.
Once you are satisfied with the result, you can delete the background layer using background removal and save the file as PNG to maintain transparency, or come back later and adjust the PSD. Use photocolorist now.